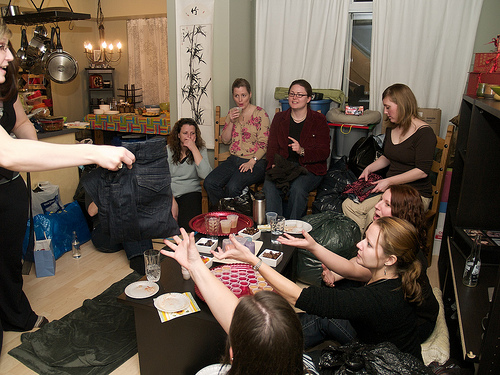
Saturday night was the long awaited, usually annual, traditional clothing swap. It’s an excuse for all us girls to get together and be girly, but at the same time, to do some serious spring closet cleaning, and I mean serious. Some of the ladies at Saturday’s gathering hadn’t been to one before, and it was obvious by their three and sometimes four giant garbage bags of clothes.

If you’re at all like me, you buy clothes that seem great in the store, but in many cases, after a few washes (or after a few too many cookies), things just don’t work out between you and said item of clothing. I’m perpetually in search of the most comfortable tops and pants that I can wear to work but that are made of just the right materials that they’ll hold up to general wear and tear and regular washings, without shrinkage or miss-shaping. Given that the majority of today’s clothes are manufactured in sweatshops with substandard fabrics, finding decent quality clothing at a reasonable price is next to impossible. And people, I don’t do dry cleaning and I loathe ironing more than the occasional wrinkle.
So, every year I usually have an impressive load of clothes to get rid of. I’m a purger, and if something hasn’t been worn in 5 or 6 months it’s time to go. This year, when I was gathering it all up, I realized that instead of feeling guilty for the wasted cash spent, I actually love being able to give the majority of the stuff I bought to people who will love it. And I’ve received my fair share of return on the swaps too. Of course, it helps that there are a few of us there who are relatively close in size.


Anything that doesn’t go to a new home to be loved goes to the Goodwill or whatever clothing charity happens to be handy. Rachel hosted for the first time, and while she had a donation box next to her condo, we filled it in no time. In fact, Rachel, newly moved into her place and somewhat short on furniture as yet, could only have hosted us all and our bags of stuff because she had no furniture!
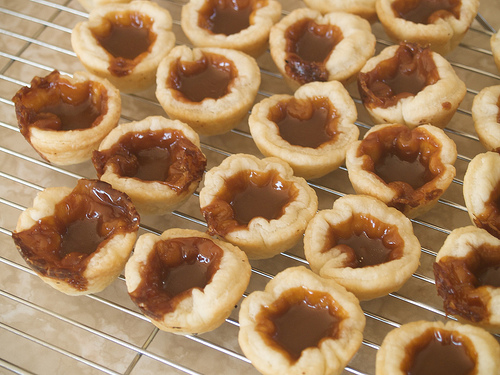
It was a potluck event and I have been wanting to try my new pie crust making skills on some tarts. I have an enormous bottle of cajeta on hand and had been ruminating on using it in place of a traditional butter tart filling. But cajeta is so decadent and rich, I decided to make wee tartlets instead, and oh sweet baby jebus, this recipe is a keeper.

Cajeta Tartlets
Cajeta (pronounced “caheta”) is a traditional Mexican goat’s milk caramel. It’s typically used in recipes for flan, or in crepes or even on fried plantains. I’ve been buying it pre-made and trying to invent ways to use it. It has a gorgeously smooth caramel texture and you can taste the goat’s milk at the “finish”. If you’ve never tried it, look for it in bottles or jars in latin grocery stores.
This tart pastry is borrowed from Smitten Kitchen’s Flaky Blood Orange Tart recipe, and it’s my new favourite sweet pastry recipe.
- 1 cup all-purpose flour (plus more for rolling)
- 2 tbsp granulated sugar
- 1/4 tsp baking powder
- 1/4 tsp salt
- 1 stick of unsalted butter, cold and diced
- up to 3 tbsp cold water
- about 1 1/4 cup of cajeta (goat’s milk caramel)
- In a medium-sized bowl, combine flour, sugar, baking powder and salt. Mix well.
- Add diced cold butter to flour mixture and toss to coat. Using a pastry cutter (also called a pastry blender), cut butter into flour mixture until it is crumbly and butter resembles the size of peas (don’t worry if it’s not uniformly all the size of peas). Resist the urge to over mix!! This is the key to a flaky pastry. You can use a food processor for this but I think you’ll get a much flakier pastry doing it by hand – it’s too easy to over mix your dough by doing it in the machine.
- Begin adding cold water, a tablespoon at a time, to help pull the mixture together. Using your hands, and with the mixture still in the bowl, squeeze and knead the mixture a minimum number of times to help bring it together. Your dough ball will be loose and it will not be uniform – this is the way it is supposed to be!!
- Wrap the dough in plastic wrap or waxed paper and allow to chill in the fridge for a minimum of 30 minutes. You can make the dough to this point and refrigerate overnight or a few days if you like.
- Preheat the oven to 350 degrees F.
- Flour your rolling surface and squeeze your dough ball into a disc shape. Roll out the dough until it is approximately 1/4 inch thick.
- Using a circular cutter approximately 1/2 to 3/4 of an inch larger in diameter than your tart tin, begin cutting circles of dough for your tarts. A large glass works well.
- Gently press your tart dough into the moulds taking care to pinch the creases so that your tart sides stay upright, and being careful not to tear through the dough. NOTE: the off cuts of your tarts can be re-rolled again, but each time you do this, the dough will become less flaky and more likely to shrink in the baking. I recommend avoiding using the off cuts if you have enough to make your tarts.
- Once all your tarts shells are ready, begin adding the cajeta. I found that I needed less than a teaspoon of cajeta in each tart, because they bubble up quite a bit in the baking process and they look less attractive when they overflow the sides (they’re no less yummy though!).
- Bake the tarts for approximately 20 minutes. Keep a close eye on them! The cajeta will bubble a lot, and if you don’t watch, the sugar in them will begin to burn. Take them out when the pastry begins to look golden at the edges. I burnt the caramel in my first batch but they still tasted fantastic and only lasted one day. I just couldn’t bare to bring such ugly little burnt tarts to a party!
Try to avoid diving into these babies until you’ve allowed them to cool at least 10 minutes from the oven – the cajeta will remain much hotter than the tart shell for longer, because of the sugar, and no one wants to burn themselves! You also might find it easier to gently lift the tarts out of the pan after letting them cool for a few minutes, but not completely, because any cajeta stuck to the edge of the pan will come off more easily when it’s still warm. Be careful not to spill your molten cajeta!
Yield: 24 mini tarts.
Would you be willing to sell those hot looking crown royal lids? Seriously, my boss is a big crown fan and would love to have these.
Thanks – Aaron